How to Make Beeswax Candles: Three Methods for Beginners
Published How we research
You can make beeswax candles three ways: pour melted wax into a container or mold, dip a wick repeatedly into a deep pot of wax, or roll a warmed sheet of beeswax around a wick. Rolling is the quickest and needs no melting at all, pouring suits jars and pillars, and dipping gives classic tapers. Beeswax is denser and burns differently from soy, so wick choice and melting care matter more than in most other waxes. This guide explains each method, the supplies you need, and the safety habits worth building from the first batch.
Products from this article
The highest-scoring picks from the buying guides this article links to. Scores are our editorial assessment, not customer ratings.
As an Amazon Associate we earn from qualifying purchases. This does not change our picks. Affiliate disclosure
+ 1 pound bags keep unopened wax clean until you need it
From our guide: Best Beeswax for Candles
+ ECO style flat braid is popular for soy container candles
From our guide: Best Candle Wicks
+ Includes the 2QT base pot, so no saucepan is needed
From our guide: Best Double Boilers for Melting Candle Wax
+ Fifteen 10 oz (296 ml) jars in one color, enough for a full batch with matching vessels
From our guide: Best Candle Jars for Homemade Candles
What makes beeswax different from other waxes
Beeswax is a natural wax produced by honeybees. It has a warm honey smell, a firm texture and a higher melting point than most soy or paraffin waxes, commonly cited at roughly 144 to 147 degrees Fahrenheit, though suppliers vary so check the data sheet that comes with your wax. It is sold as pastilles, blocks and sheets, and as filtered or unfiltered, which changes color and scent.
Because beeswax is dense, it usually needs a larger wick than a soy candle of the same diameter. Undersized wicks drown in the melt pool and tunnel down the middle. Plan to test several wick sizes rather than assuming the one from a soy recipe will transfer. Beeswax also tends to carry less added fragrance well, and many makers leave it unscented to enjoy the natural aroma.
Melting beeswax safely
Always melt beeswax indirectly. Set a pouring pitcher or a dedicated melting can in a pot of simmering water, and never place wax directly over a flame or on a bare burner. Wax is flammable, and overheated wax can ignite. Keep the pot supervised the entire time and keep a lid nearby to smother any flare-up. Do not use water on a wax fire.
Use a thermometer and keep the temperature within what your wax supplier recommends. Beeswax cools and thickens quickly, so a small amount of leftover wax in the pitcher turns solid fast. Dedicate your melting tools to wax, because cleaning beeswax from a household pot is a chore. Silicone spatulas and old stainless pitchers are easy to clean once the wax is wiped off while still warm.
Pouring a beeswax container candle
Choose a heat-safe jar or tin and attach a pre-tabbed wick to the center of the base. Beeswax shrinks as it cools, so jars with straight sides and a slightly warmed interior help the wax stay attached to the glass. Pour slowly at the temperature recommended by the supplier, then let the candle cool on its own without moving it.
Expect a sink hole or a dip around the wick as the wax contracts. A second small pour once the surface has set fills it. Trim the wick to about a quarter inch before lighting. Test the candle through a full burn, watching for a melt pool that reaches near the edge, a steady flame, and no soot. If the flame looks small and the center drowns, try the next wick size up.
Rolling candles from beeswax sheets
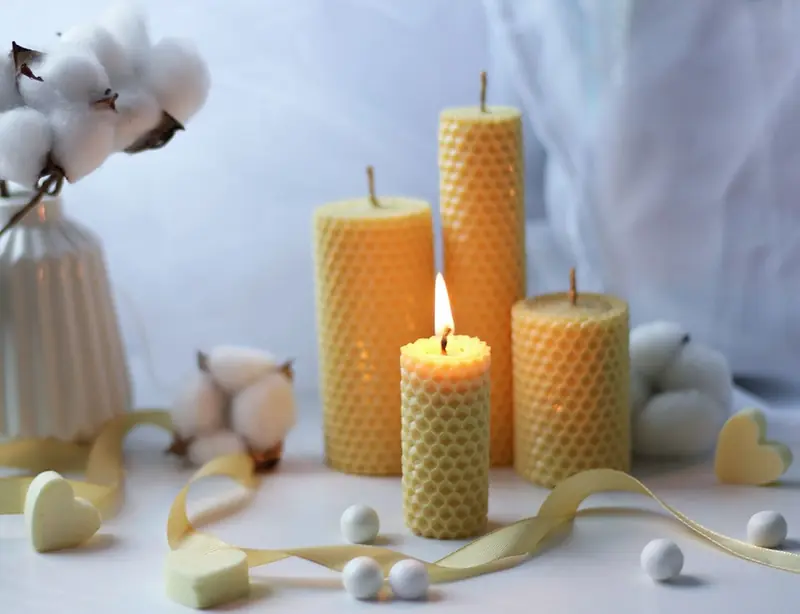
Rolled candles are the simplest entry point. Sheets of beeswax come in honeycomb patterns and can be pliable at room temperature, though a cold sheet cracks, so warm it with your hands or a hair dryer on low for a moment. Cut a length of braided wick a little longer than the sheet is tall, place it along one short edge and press the wax gently around it.
Roll tightly and evenly, keeping the bottom edge level so the candle stands upright. Press the final edge down to seal it. For a taper, roll a long narrow triangle instead of a rectangle. Rolled candles have no container, so burn them in a stable holder on a nonflammable surface, trim the wick before lighting and never leave them burning unattended.
Dipping beeswax tapers
Dipping needs a deep, narrow container of melted wax, ideally taller than the candle you want, and enough wax to cover the length of the taper. Hang a length of wick from a weight or a dowel, dip it slowly into the wax, lift, and let each layer cool before the next dip. The first few coats look thin and uneven, but a candle gradually builds in thickness.
Work in a steady rhythm and keep the wax at a consistent temperature. If it is too hot, each dip melts the previous layer away, and if it is too cool, you get lumpy layers. When the taper is as thick as you want, trim the bottom and roll it on a flat surface while it is still slightly soft so it straightens. Hang finished tapers to cool completely.
Fixing common beeswax problems
Cracks and a pulled-away surface usually come from cooling too quickly, so let the candle set at room temperature. A candle that tunnels is generally underwicked, while a flame that is tall, sooty or flickering suggests the wick is too big or needs trimming. Frosting, a white bloom that sometimes shows on beeswax, is normal and cosmetic and does not affect burning.
Write down the wax, wick, jar and temperature for each test so you can repeat what works. Keep candles away from drafts while burning, burn them on a heat-safe surface and never leave them burning unattended or near anything flammable.
Scent, color and finishing touches
Pure beeswax already smells of honey, so many makers leave it unscented, and adding fragrance oil can muddy that aroma. If you do want a scented blend, mix beeswax with a softer wax and test small batches, since heavy loads can interfere with the burn. Always stay within the fragrance limits published by both your wax and oil suppliers.
Color is mostly set by the beeswax itself, which ranges from pale cream to deep gold depending on how it was filtered. Dyes can be used, but the natural tint shifts the final shade, so experiment on small pours first. For a clean finish, wipe the jar with a lint-free cloth and trim the wick before photographing or gifting the candle.
Store finished candles away from direct heat and sunlight, which can soften the wax or fade color, and keep them in a cool room until they are used.
Popular right now
- Best Heat Guns for Candle MakingBuying guide
- Best Wooden Wicks for CandlesBuying guide
- Best Soy Wax for CandlesBuying guide
- Pillar wax explainedGlossary
- Best Paraffin Wax for CandlesBuying guide
- Choosing Safe Vessels for Container CandlesArticle
Based on the last 28 days of search and visitor data.